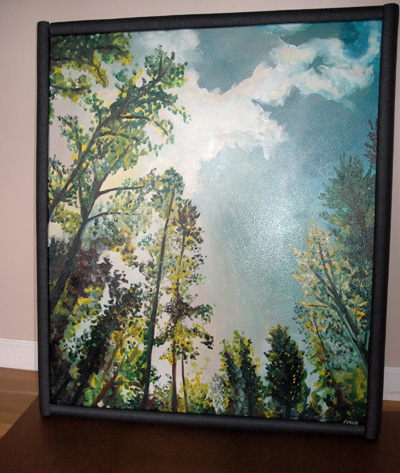
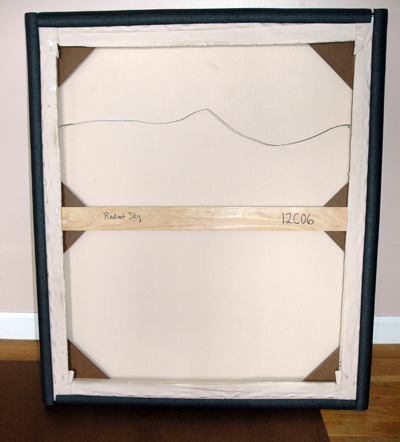
I just sold this painting, Radiant Sky, and had to ship it to its new owners 3000 miles away from me.
It’s 42″ x 36″. For a painting that large I always construct a sturdy shipping crate to protect it.

I use foam pipe insulation to protect the edges of my paintings. (Most are gallery-wrapped on a 1.5″ deep canvas.) These foam tubes can be found in the plumbing section of a hardware store. They usually come in 8-foot lengths and they have a slit all the way down.
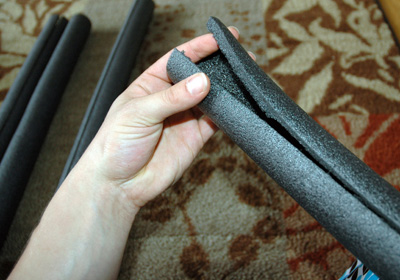
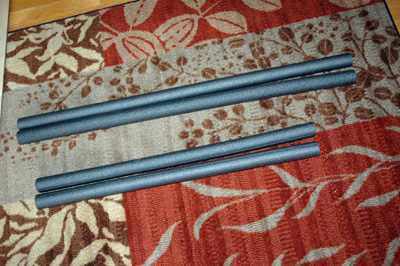
I cut 4 pieces to fit the 4 sides of the painting.
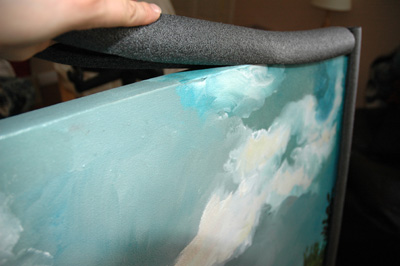
If you have the right size tube, it should fit nice and snug onto the edges of the painting, and protect it all around.
*Note: Do NOT put these foam tubes on an oil painting that is still tacky–they will leave imprint marks in the paint. Make sure your painting is *completely dry* before packing with this method!
I make sure to cut the pieces slightly longer than the sides of the painting so the corners do not stick out past the tubes.
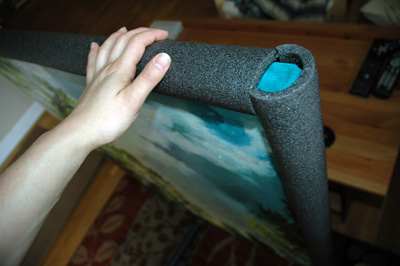
The painting’s edges are now protected all around in the front and the back.
If shipping a painting smaller than about 20″ in both dimensions, at this point I would cut sheets of cardboard to place over the front and back, wrap around both directions with packing tape, then build a cardboard box to fit. This way the painting is protected around the edges by the foam, and on the front and back by 2 thick sheets of cardboard. I’ve never had a painting damaged this way.
Large-scale paintings on canvas like the above piece, however, need more protection.
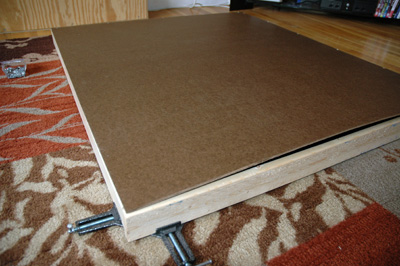
For this large painting, I built a wooden crate to fit the dimensions of the painting exactly.
The foam insulation adds about 1/2″ on either side of the painting, as well as about 1/2″ on the front and the back, so a box for a 42″ x 36″ x 1.5″ painting needs to have interior dimensions of at least 43″ x 37″ x 2.5″.
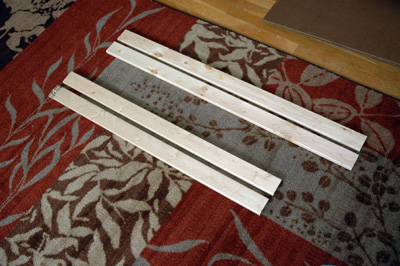
For shipping crates, I buy the cheapest pine boards I can get. They are often warped and have all kinds of flaws, but for this purpose they don’t have to be pretty–just try to choose pieces that look fairly straight.
When calculating your measurements, you must also account for the thickness of the wood itself–the exterior dimensions of the box will include this thickness. I’m using 1″ x 3″s. (Which, in reality, measure 3/4″ x 2 3/4″, not 1″ x 3″!)
If you are using 1″ x 3″s, the wood will add 3/4″ to each side of the box. So, accounting for both the foam insulation and the thickness of the wood, the exterior dimensions of my crate will be 44.5″ x 38.5″. These are the measurements I used to cut the 4 pieces of wood for the 4 sides. The shorter pieces are 38.5″ and the longer pieces are 43″ (the 44.5″ minus 3/4″ on each side to account for the thickness of the shorter pieces.)
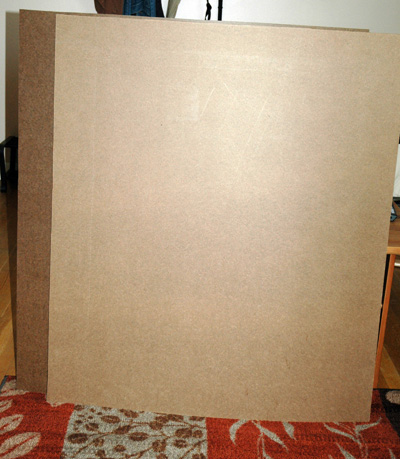
I then use a table saw or circular saw to cut 2 pieces of Masonite hardboard (also easily found in a hardware store) to the outside dimensions of the box–44.5″ x 38.5″. These will cover the front and back of the painting.
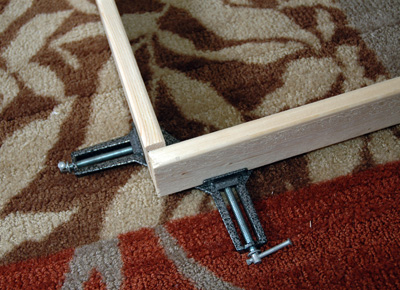
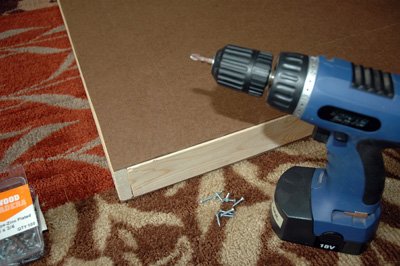
Now to assemble the pieces. It helps to use a miter clamp to start (this is a clamp that holds 2 pieces of wood at a right angle to each other.) I clamped one of the short sides to one of the long sides, being careful to align them correctly with the short side (bottom) overlapping the long side (left.) Depending on how you cut your wood, it could be either way, but you want to make sure to get this detail right.
I then place one of the Masonite boards on top, line all the corners up, and screw the Masonite to the wood, starting by putting one screw about an inch or so from the ends of the 2 pieces of wood. I use 3/4″ screws for this.
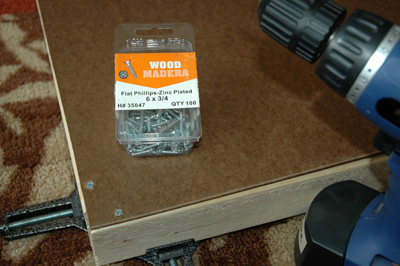
After the first corner is screwed together, I go down the 2 sides and secure screws every 9-10″.
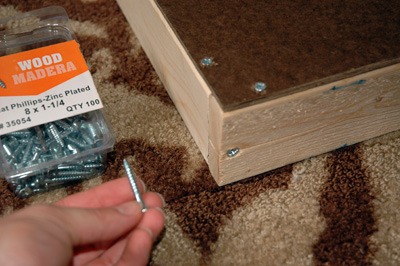
I use longer screws (1 1/4″) to attach the 1″ x 3″s to each other–one screw into each corner. In the picture you can see the screw on the bottom which goes all the way through the 1″ x 3″ on the bottom and anchors into the 1″ x 3″ on the left. This will add a lot of sturdiness to the crate.
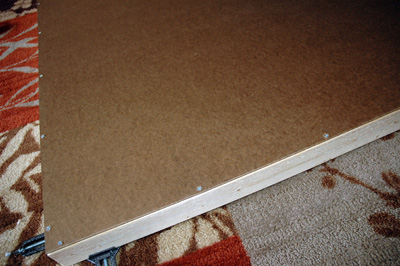
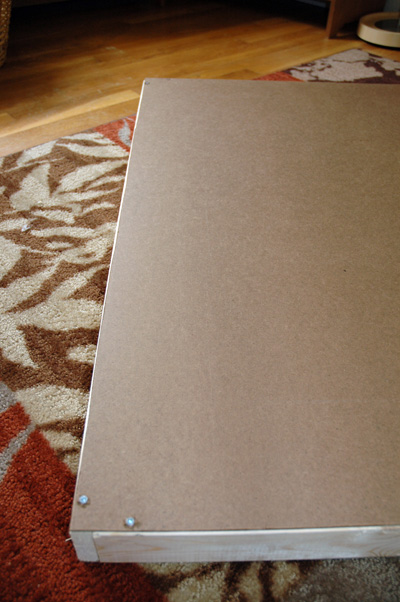
When the first corner and 2 sides are done, I flip the whole thing over, clamp the remaining 2 sides together and put them in place under the Masonite, to work on the opposite corner. You can see the Masonite is bowed on the bottom edge–this won’t be an issue once it is screwed down.
The order you do things in is not that important–just make sure to line everything up well and put a screw an inch or two from the ends of each of the 4 1″ x 3″s, and screws at regular intervals along the 4 sides.
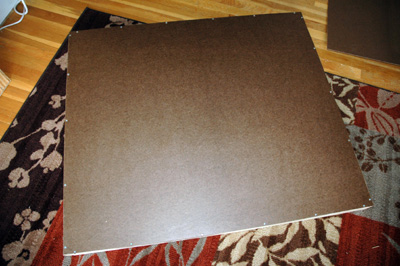
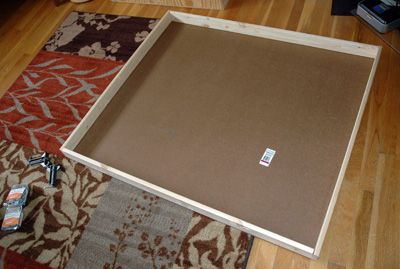
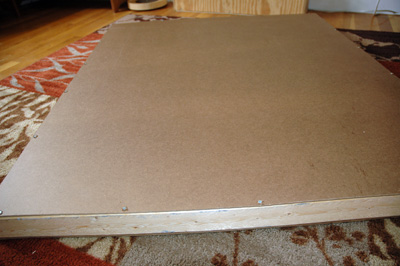
You can then turn the box over to see the inside, and it should be nice and sturdy if you’ve done a careful job.
Notice the white UPC sticker on the inside of the box–I always make sure to put the Masonite pretty-side-out.
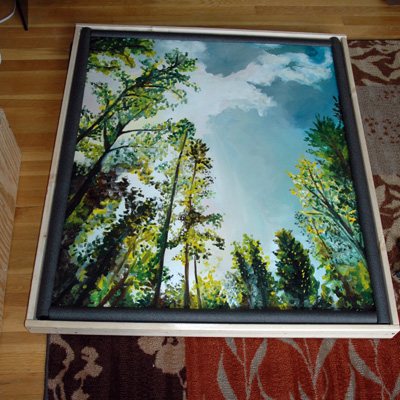
The painting, along with foam tubing, fits snugly into the box without having to force it. A perfect fit means no shifting during shipping, and a very protected painting.
I made the inside depth of this crate almost exactly the depth of the padded painting–but if your crate is much deeper than your painting, I’d fill the empty space with lots of plastic bags or foam peanuts (again, be careful with anything touching the face of the painting unless it is 100% dry!) to prevent the painting from shifting from front to back.
I said one last goodbye to my art and then lined up the other piece of Masonite over the top. To attach this side, I used the same 3/4″ screws as the other side and secured them in the same pattern.
Always start at the corners.
Then add screws at regular intervals along the sides.
And you’re finished! The painting is padded and snugly packed inside the crate. Even if they throw it around roughly during shipping, all the edges of the painting will be protected by a layer of foam and a layer of wood.
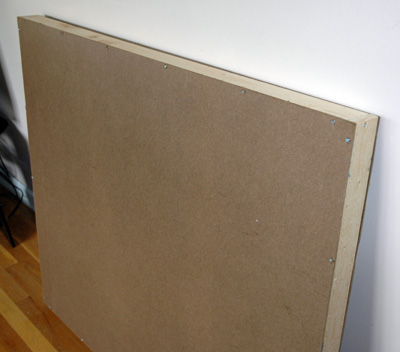
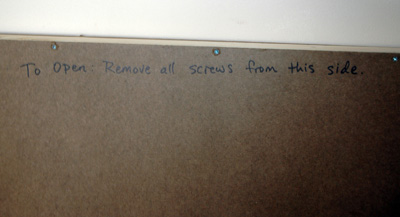
I like to write clear instructions for the recipient for how to best open the crate when it arrives. I wrote “To Open: Remove all screws from this side.” along each of the 4 edges of the “front” side of the crate–so when they unscrew the piece of Masonite and lift it away, the first thing they will see is the face of the painting.
I hope this little tutorial was not too confusing and might help someone who needs to ship some of their very valuable art! Questions are welcome.
Do you just slap a shipping label on it just like that? Masonite seems a good and sturdy choice. Approximately what is the end weight and with whom do you ship?
Have you ever had to ship a framed piece and would you do it the same way (without glass)?
Oh and thank you Cedar for being so explicit with your tutorial!
You’re welcome Lisa!
Yes, I just stick the shipping label right on there. I use FedEx and I’m very happy with them. I always prepare the shipping label online then just drop off the package at FedEx.
Masonite suits my purposes and seems pretty sturdy, but if you wanted something even sturdier you could also use plywood–but it would make your crate heavier.
This package ended up being 31 pounds. The painting itself was quite heavy as it was stretched over poplar with lots of bracing–many paintings will be lighter.
All my paintings are gallery-wrapped, so I don’t think I’ve ever shipped a framed painting, but for most frames I’d imagine the same foam tubes would work fine. For an ornate frame with pointy edges or small delicate parts, I’d probably use lots of bubble wrap. You can be creative with padding depending on the situation–just make sure to measure for your crate after you’ve added protective padding to the painting!
I would be nervous shipping a framed piece with glass because I’ve never had any experience with that–but I’m sure there are ways to do it safely. I’d welcome input from anyone who knows a good method to protect glass in shipping (just out of curiosity.)
Thank you so much for generously sharing your knowledge and experience, and graciously answering my questions!
That was really helpful Cedar. Thanks for sharing.
You’re welcome Bonnie–glad it was helpful to you!
Wow, this is so incredibly useful! Thanks for taking the time to share Cedar, you’re awesome!
You’re very welcome, Remya!
How much did it cost to ship?
Hello, this was several years ago so I do not recall the details of that shipment. However, it’s typical these days for a large-scale painting in this size range to cost $150-$300 to ship, depending on how far you are shipping it, how much you insure it for, and what shipper you choose. If you have an estimate of the size of your package and an estimated weight, you can use these numbers to get a price estimate from FedEx, UPS, or DHL. Just pretend like you are creating a shipment but don’t complete the shipment, if you need to get an idea of the shipping cost. Of course, don’t forget to add the cost of your packing materials to your costs!
Hmm, hi you seem to have the same question I do.
I came here looking for ideas about shipping a mixed media stained glass piece to Japan.
My only fortunate fact is that it’s something like 8 x 10″.
like any artwork it’s one of a kind. I’m not even an artist by trade.
It’s something I’ve added to for a year and change as new ideas come to me.
So suffice it to say should something happen to it there won’t be another one.
I’m not a well-off person, but since this is something I’m doing just for me I’m willing
to pay what’s needed to get it where it’s going safely.
I thought to make a small custom crate for it from old pallets.
wrap the piece in foam sheet with something to serve as movement cushion
ie: hay, popcorn, bubbles.
Glass that is kept completely still is asking to be be broken.
The piece must be allowed to move inside the crate/box a small amount when it encounters impacts.
I was mostly concerned about the carrier sitting many boxes on top of this; especially set in a horizontal position.
Does Fedex even airmail crates? What do you think of my idea?
Hi Jon, yes, you have the right idea exactly. For anything fragile like that, you’ll want to wrap it securely in padding–I would probably choose bubble wrap and/or foam. Then suspend that wrapped package in your sturdy box within packing peanuts or similar. Luckily, it’s pretty straightforward to pack something small. Yes, FedEx will ship wooden crates. I’d use the most lightweight material you can to keep the weight down while also keeping the box sturdy. (Since this isn’t large scale, I might do several layers of thick cardboard rather than wood; as long as it’s very sturdy you’re good.) And mark it all over with “Fragile” on the outside.